It's actually been a few weeks now, but you should really go check out our new blog.
Mae & K
Thursday, April 10, 2014
Tuesday, January 21, 2014
Confessions of a Non-Chef: Karen's adventure in freezer meals
The post you are looking for has moved. Sorry for the inconvenience!
Adventure in Freezer meals

Saturday, November 16, 2013

Thursday, November 14, 2013


Wednesday, November 13, 2013
Tuesday, November 12, 2013

Saturday, November 9, 2013
Bringing Home a Guest Post
Today I decided it was high time to bring home a guest post I shared at Project Run & Play. I adore the infant peasant dress, and this is one of my favorite ways to make them.

Hello! I'm Maegen, and I am extremely excited to be guest posting today! I blog over at Foster Ramblings, though blog posts have been sparse during my first trimester. I have one sweet little boy, who I love to sew for, but we're hoping baby #2 is a girl, seeing as I spend so much of my time sewing dresses.
I have been following Project Run and Play since season 3, and decided right away I wanted to get in on the fun. During the All-Stars season I was shocked and excited by my win with my Starry Night inspired dress.

But before the time commitment this sort of embroidery requires scares you away, today I'll actually be sharing a tutorial based on one of my other sew along looks.

That little orange gingham number in the bottom middle. The consensus has been that this dress is the favorite. My husband definitely loves it. So I'm going to share with you how I altered one of my favorite patterns to make it.

The pattern is Sew Much Ado's Infant Peasant Dress. I love this pattern! I've probably made 20 of these adorable little dresses. But, the tiny little elastic casings for the sleeves are very time consuming. So I created an alternative sleeve.

Alright, to start off, you'll cut out your front and back pieces in your base fabric. I used a muslin that is extremely wrinkly.

Then you'll cut out a front and back of your top fabric using only the top part of the dress pattern. The bottom of my fabric is about 8 inches up from the bottom of the pattern piece. You'll need to put a small hem in the bottom of this piece right away.

Lastly, cut two sleeve pieces. These are just rectangles. I've had success with sleeves that are 4 X 3 1/2 inches, 4 X 4 inches, and 4 X 5 inches. I did not have success with a sleeve set that was 4 X 9 inches. Anything bigger than 5 inches stretches the neck out too far.

Take a sleeve piece and fold it in half with right sides out. (the finished sleeve will be 2 inches long). Then pin one side to the top of your dress piece, also right sides together.

Take your shorter dress piece and pin it on top of the sleeve and other dress piece. Right sides together. Your sleeve is sandwiched between the dress pieces.

Here's a view of the sleeve pinned in place.

And after it has been sewn. You don't need to sew down the sides of the dress at this point-- just around the armhole.

Pin the other side of your sleeve to the other two dress pieces and sew along the armhole.

It seems weird, but it should turn out. Don't be discouraged if you get things twisted.

You'll want to repeat those steps with your other sleeve. The hardest part is sewing the last sleeve in place. One side of the dress will be hanging out from between the pieces of the other side. Like in the picture above.

Top stitch your contrasting piece to your base piece, and the hard stuff is done! From here on out, you'll follow the original tutorial.


My little model wasn't very happy for pictures at first, but after a change of diaper and a change of outfit, we got some cute shots.
Here's Charlotte in a simplified version of the sleeve, without the lined bodice.

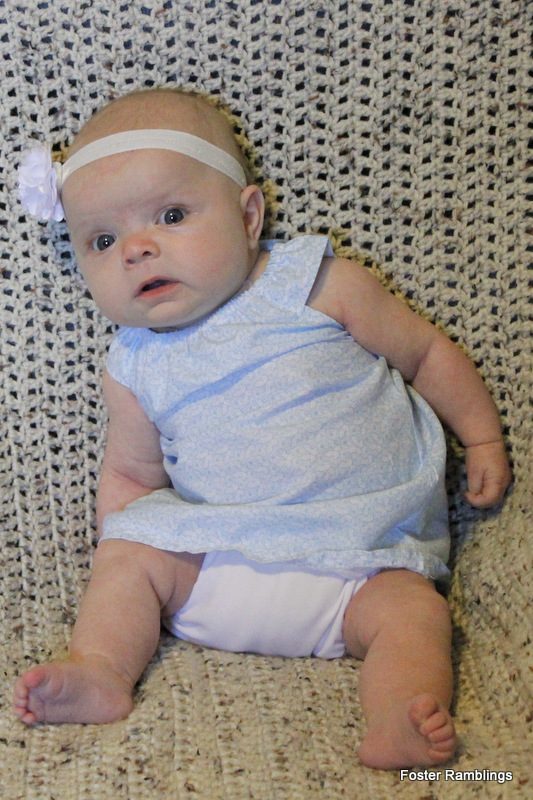
Head on over to my blog for a little more information on this little blue dress.
Thanks for having me, I can't wait for next season!
Saturday, October 26, 2013
Friday, October 18, 2013
Kids Clothes Week: This is the Plan
I've never officially participated in KCW before. Just sort of happened to make something that week and decided to count it. This time I'm going in with a plan.
Mack doesn't need clothes. Seriously, between what I've made for him and all the hand-me-downs from my cousin Dennis, he has more clothes than I do. And the unfinished plaid shirt from the plaid week of Project Run & Play is still too fresh for me to be ready to tackle again.
Which leaves me with a big, "Who to sew for?"
And the answer, MY NIECES! I have four nieces planning to make appearances in December (don't even get me started on how weird it is that me, my best friend, and two of my sisters-in-law are all due within 2 weeks!) who are going to need something cute from me. So I'm planning to get the bulk of my baby gift sewing done.
For Piper:
- Olivia and Oliver Pea Coat
- Infant Peasant Dress (This little beauty is already cut out, and I already spent time on an embroidery detail, but has yet to be sewn)
For Georgianna:
- Infant Peasant Dress
- {tiny} tumble tee
For Lily & Emma:
- Sally Dresses
I'm planning to tackle the projects in that order, but I'm really hoping to get down to those Sally Dresses. The pattern is darling, and I was lucky enough to win a copy!
If by some miracle I get all 6 of those projects done, I'll make a little something for my own new baby, who has all of Mack's hand-me-downs, but is in need of jackets. There's a bit of a wardrobe difference between a December baby and a June baby.
Now to get going on cutting out those patterns!
Wednesday, October 16, 2013
A Little Halloween Owl
Do you know about Ravelry? No? If you like to crochet or knit you seriously need to check it out!
I ran across an adorable (and free!) pattern for little owl ornaments recently, and I have been dying to make some.


I ran across an adorable (and free!) pattern for little owl ornaments recently, and I have been dying to make some.

Halloween Owl

I didn't have any plastic safety eyes or white felt on hand, so I decided to just sew on eyes. I also added little tufts of yarn to the ears.

This little guy didn't take very much time to make, and turned out pretty darn cute. Mack thinks he's a pretty fun little toy.

Here Mack is introducing himself to the owl and to the tiny pumpkin he picked out for the baby. The owl is really small, and would make a very sweet little ornament.
Linked to:
Tuesday, October 15, 2013
Confessions of a Non-Chef: Tuna Casserole
If you read my intro post, you may remember that I mentioned making a legendary Tuna Casserole.
 Why legendary? Because I only get it a few times a year, and on one day in particular: My Birthday!
Nathan really hates this casserole, and so do several of my siblings. So we spare them the horror of peas and tuna 364 days a year. But on my birthday, when I get to pick whatever I want for dinner, we have tuna casserole. I don't remember when I started picking this particular dish, but it's so much of a tradition that my mom still makes it for my family, even though we don't live near them.
I changed up my mom's original recipe by using cream of chicken soup rather than cream of mushroom. Mushrooms are not my thing.
This dish has everything I love: peas, noodles, cheese, potato chips, and tuna fish.
Kiah makes it with fresh tuna (I'm a little jealous that they live near fresh fish!) and says it's ten million times better. Someday I'm going to have to try it, because I already think it's awesome.
Thursday, October 10, 2013


Wednesday, October 9, 2013
Confessions of a Non-Chef: Why I Cook
I've decided to start a series where I share recipes and tell you all about my cooking adventures. Not because I'm an amazing chef, but because I am really just sorta okay at cooking. And I'm fine with that. We can't all be amazing at everything, and I'm sure I'm not the only person out there who tries with all their heart to be that awesome mommy who can bake everything from scratch- and only sort of succeeds.
I found myself crying a few months back after I burned my 3rd attempt at chocolate chip cookies in as many nights. Why was I crying? Because I had somehow failed at making cookies from a tube. How do you fail at making cookies when all that is involved is: separate, put on pan, put in oven, take out of oven and enjoy?
We later came to realize it wasn't my dismal cooking skills or even me being scatterbrained, but rather an oven problem. Once the oven problem was fixed, things got much better. But I came to a realization as I cried over those no-fail cookies.
"I am never going to be a world-class chef and I am okay with that."
I don't really enjoy cooking. I'd much rather be doing something else. I often forget to add things in the right order, and I tend to just "eyeball" measurements. Most of the time even the yummiest things I make end up looking a little odd. But I cook for a greater purpose than just making food that tastes good and is super pretty. I cook to feed my family. I make all those breakfasts, lunches and dinners because I love my family and feeding them is a way I can serve them.
Now, before you think I'm being too hard on myself, I do want to let you know that there are a few things I make well. I make delicious brownies (and have been since 1998). I make rolls that look really funny and taste really good. My potato salad is nearly worth indenturing yourself to me; and my Tuna Casserole is legendary. Everyone has their good days and bad days. The other day I made absolutely gorgeous bread and decided to try my hand at popovers and banana bread. Each one was a success! Then there are the, "I barely managed to make toast without burning it, you want me to make what for dinner?" days.
I plan to share plenty of successes, and probably just as many failures.
Are you ready for this?
 |
| Me in the kitchen around age 10 |
Thursday, October 3, 2013

Monday, September 30, 2013
So excited!
I am the lucky winner of a copy of the Sally Dress pattern by Shannon from luvinthemommyhood!

Some of nieces will be treated to an adorable dress in the near future. Thanks so much Jenn and Shannon!
Did you see the adorable dresses Jenn made for her girls?

Some of nieces will be treated to an adorable dress in the near future. Thanks so much Jenn and Shannon!
Did you see the adorable dresses Jenn made for her girls?
Friday, September 27, 2013
Preggers
If there's anything more exciting than being pregnant...

It's getting to be pregnant at the same time as your best friend!

Kiah is due with a little girl just 9 days before I'm due.

Kiah and Mikel were in the area for a wedding, and we were lucky enough to steal them away for an evening. We had a lot of fun just catching up and chatting. I wish so much that we didn't live 14 hours away, it would be so nice to be able to hang out like that all the time.
(And to use her daughter as a model after she's born!)
Kiah left with a few Maegen-made things for Baby. A little pea coat, my Oliver + S remix top, hairbows, and some beanies including one exactly like the one I made for Fizzie. There are a few more projects in the works for her little girl, and I'll be sharing those as I complete them.
Subscribe to:
Posts (Atom)